"With GA4 destined to have an impact on how we measure online activity in the future, gaining a head start on planning, strategy, implementation, and training will be critical"
Google Universal Analytics will no longer process data from 1st July 2023. If you are not currently using Google Analytics 4 (GA4), now is the time to migrate from Universal Analytics. Google Analytics 4 is the next generation of Google's web analytics platform. It uses machine learning to automatically surface insights and provides more granular control over data collection and processing.
If you're currently using Universal Analytics (UA), you may wonder how to switch to GA4. In this article, we'll walk you through the process of upgrading from Universal Analytics to GA4, with added steps at the end for those of you managing your tags with Google Tag Manager.
What Is Google Analytics 4?
It's the latest version of Google's analytics platform. It offers a number of features and enhancements not available in Universal Analytics. Although Universal Analytics offers a variety of privacy controls, Google Analytics 4 is designed with privacy at its core to provide a better experience for both markets and their website visitors.
If you're looking to switch to Google Analytics 4, one of the key features you'll be interested in is its User-centric measurement using an event-based data model. This means you can now measure how specific user interactions drive business outcomes.
Essentially, it's the replacement for Universal Analytics, so it's important to make the switch sooner rather than later.
Why Should You Switch To GA4 Now?
The deprecation of Universal Analytics will happen in less than a year. After July 1st, 2023, any data processed by Google Analytics will no longer be sent to your Universal Analytics property.
This doesn't mean your website will stop working, but it does mean that you'll need to switch to GA4 before this date to continue tracking your data.
Also, GA4 uses data modelling to automatically surface insights that would otherwise be hidden in your data. Even if you don't plan to use it immediately, gaining data and improving your machine learning (ML) models will make future analysis more reliable.
Finally, you'll have a year-on-year data comparison in GA 4 and your Universal analytics property to gain insights into your website's performance over time.
The recommended approach is to set up a GA4 property alongside your Universal Analytics property. This will allow you to compare data and benchmark your website's performance over time.
It's important to note that you cannot combine data from multiple properties in Google Analytics 4. So, if you have multiple websites, you'll need to create a separate GA4 property for each one.
Upgrading From Universal Analytics To GA4
Step 1
Log into your existing Google Analytics account and access the property you'd like to upgrade. You will see a notification at the top of the screen indicating Google's intention to Sunset Universal Analytics, with a button to start the process.
As mentioned above, this won't affect your existing Universal Analytics property. It will be set up as a separate property that will work alongside it until Google sunsets UA, so let's go...

Step 2
You should now have started the Google Analytics 4 Setup Assistant, which is very straightforward and guides you through the process.
As you don't already have a GA4 property, you will want to create a new one. Click Get Started.

Free Report
Spot Errors, See Strategies,
Our Free Report Reveals Key E-Commerce Fixes.
Book Your Call
Step 3
Here Google Analytics will inform you of what's about to happen. It will essentially use the settings from your existing Universal Analytics property to create the new GA4 property.
Check the box to 'Enable data collection using your existing global Site tag(s), then click 'Create Property. (If you are using Google Tag Manager, you won't be able to select the checkbox, but click 'Create Property' and proceed to step 4.)
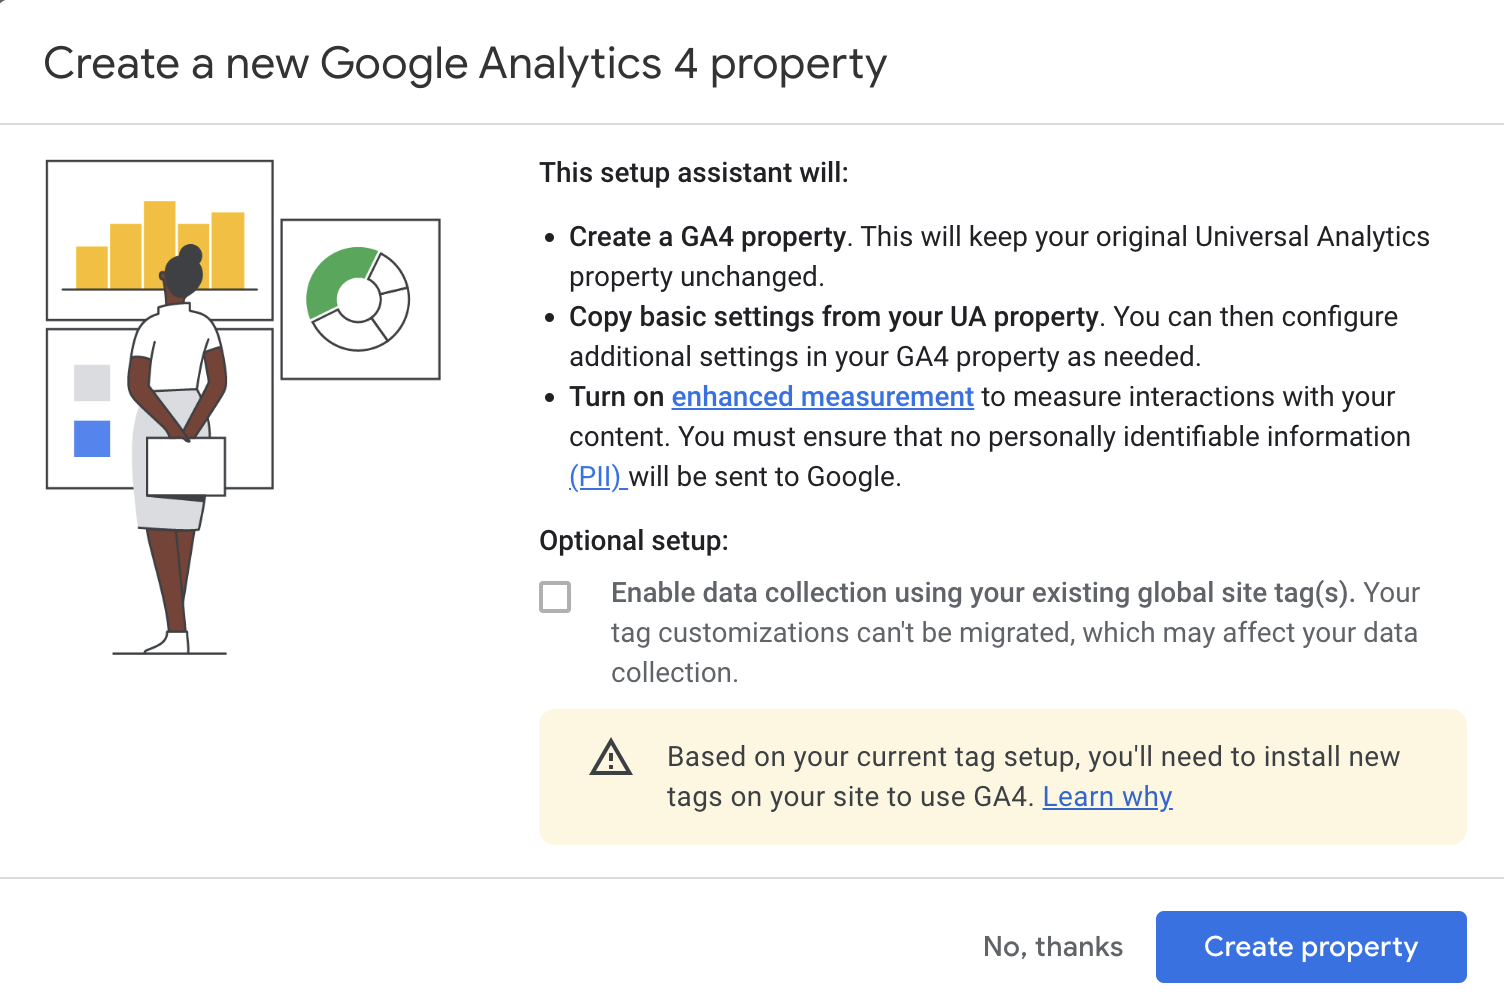
Once you click Create Property, the setup wizard will:
- Create your new GA4 property.
- Copy the property name, website URL, timezone, and currency settings from your Universal Analytics property
- Activate enhanced measurement of your GA4 property.
- Create a connection between your Universal Analytics and GA4 properties. (This connection allows you to use Setup Assistant in your Google Analytics 4 property to migrate configurations from your Universal Analytics property to your GA4 property.)
- (If your site is tagged with gtag.js and you elected to Enable data collection using your existing tags in Step 3 above) Create a connected site tag between your Universal Analytics and GA4 properties.
Once this process is complete, you will see "You have successfully connected your properties" at the top of your Google Analytics 4 Property Setup Assistant page. For those of you using Google Tag Manager, continue to step 4 below.
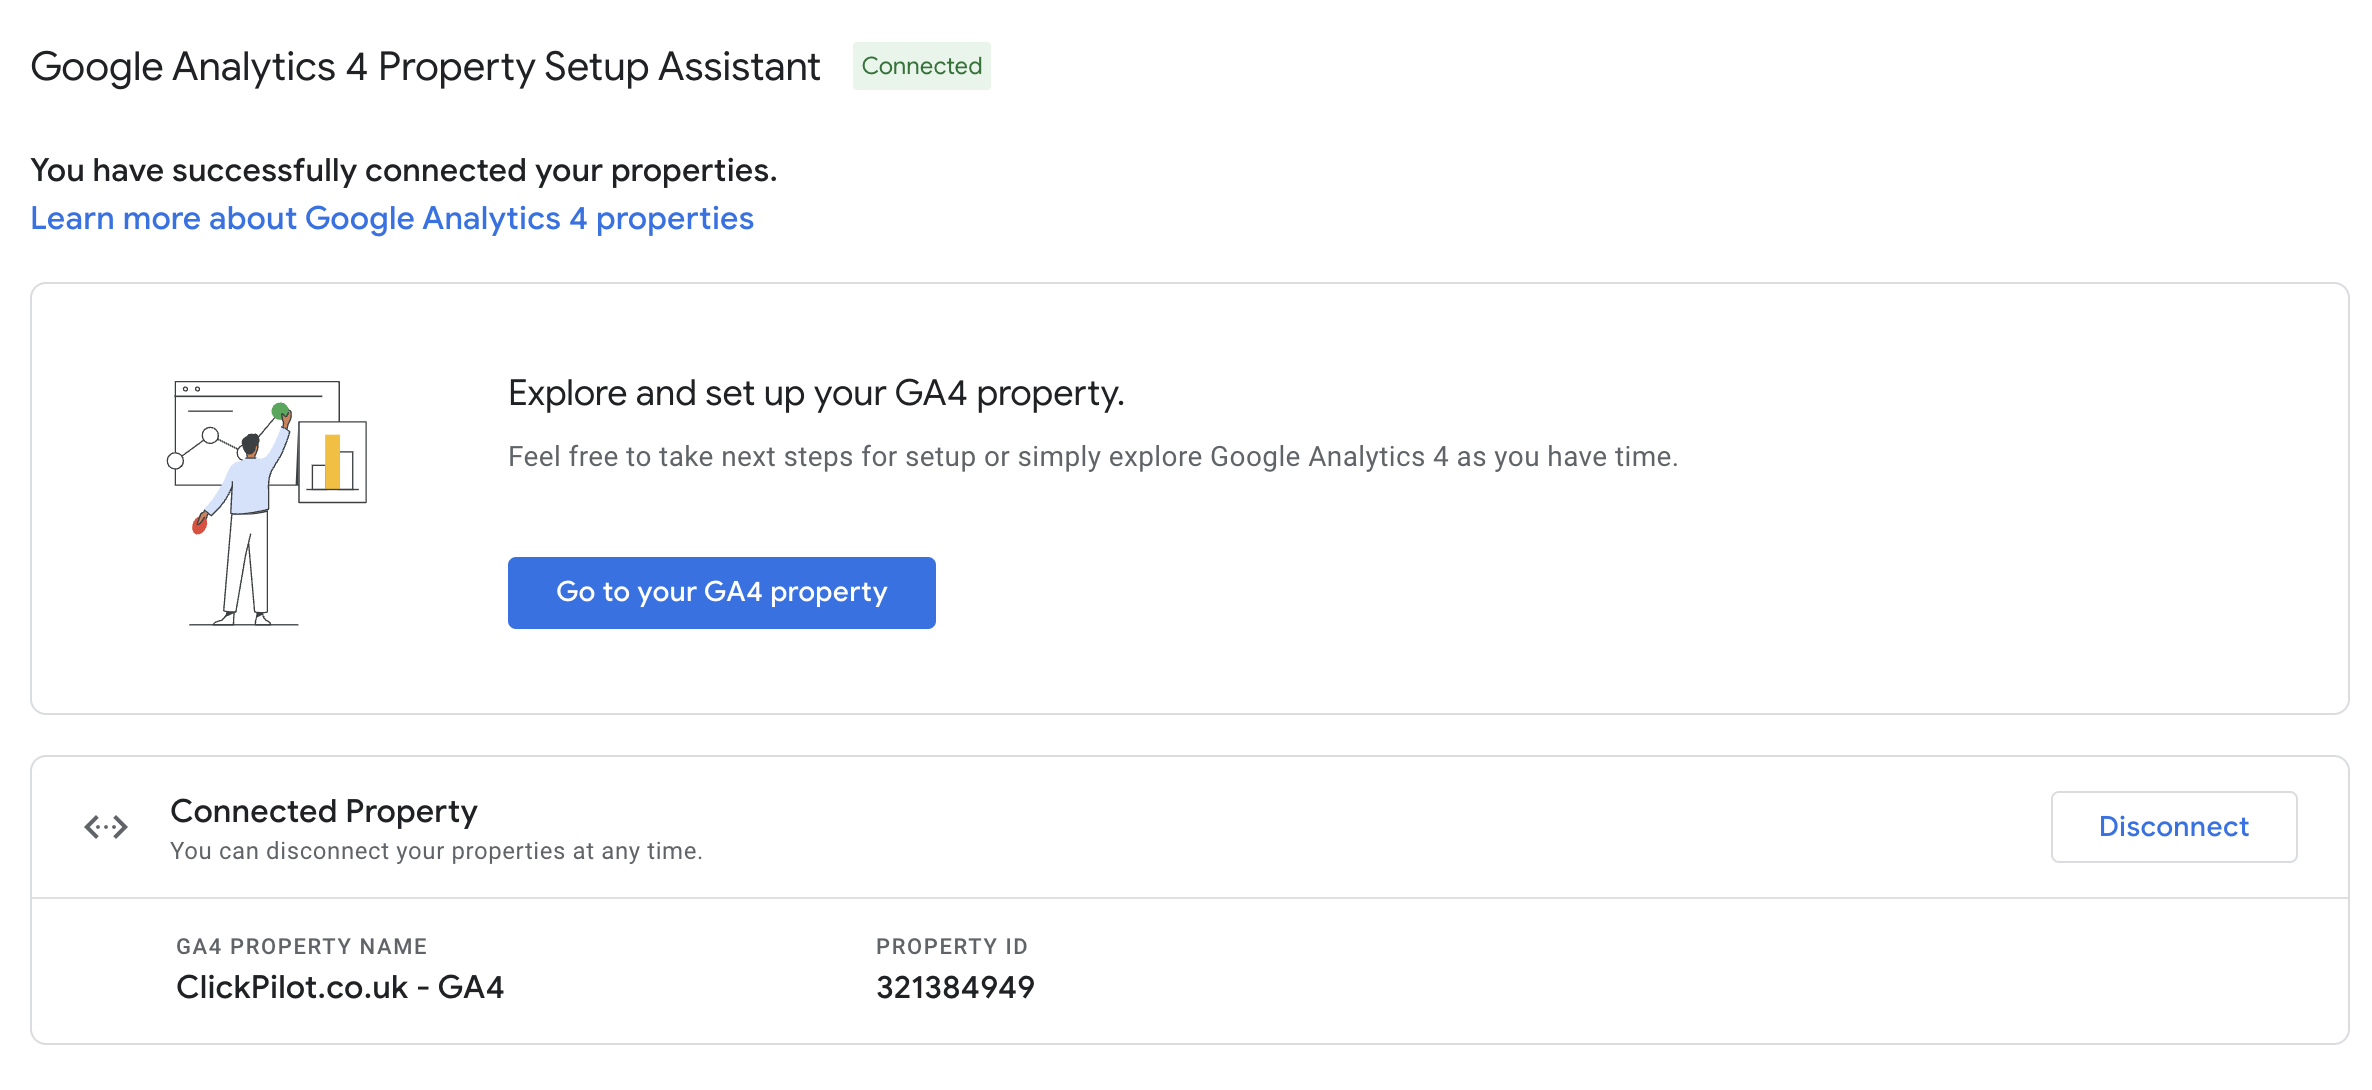
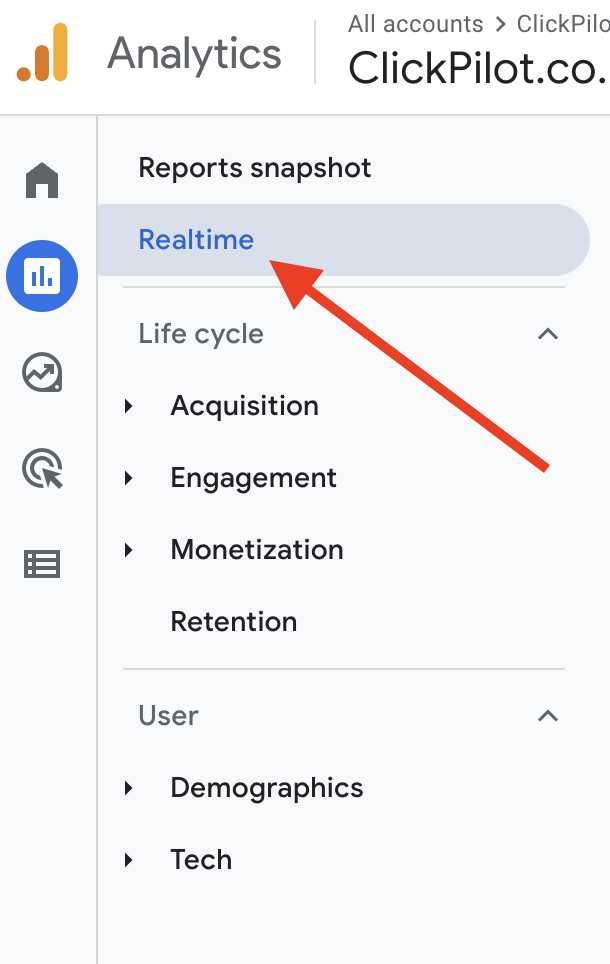
To check that data is being collected, open a new browser tab and go to your website, then go back to your Analytics 4 property that you had open in the other browser tab, and choose 'Realtime' from the report menu. This view reports the number of visitors to your website in real-time. So you should see at least one user is active on your website.
Getting Started With
Performance Max
Download Our Step-by-step guide to getting started with Performance Max Shopping Campaigns for your Shopify Store
GET YOUR FREE EBOOKFREE EBOOK
Step 4 (those using Google Tag Manager)
Get your GA4 On-Page tag for Use In Google Tag Manager
If you are using Google Tag Manager (GTM) to manage the tags installed on your website, then to install GA4, you'll need to add it to your Tag Manager workspace using the GA4 on-page tag.
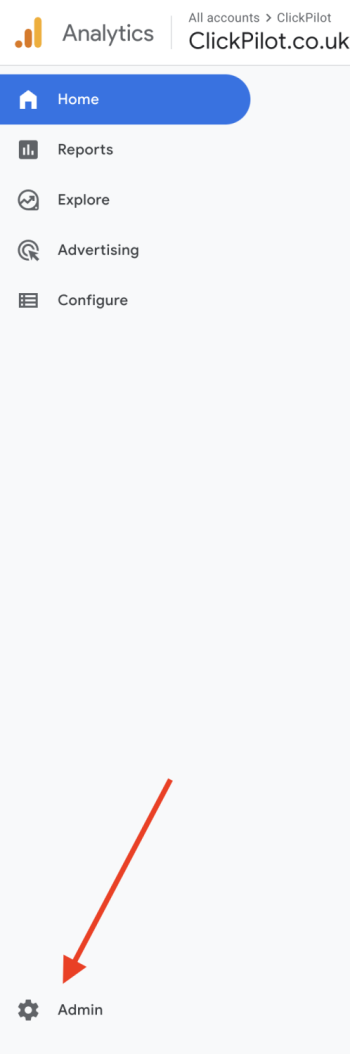
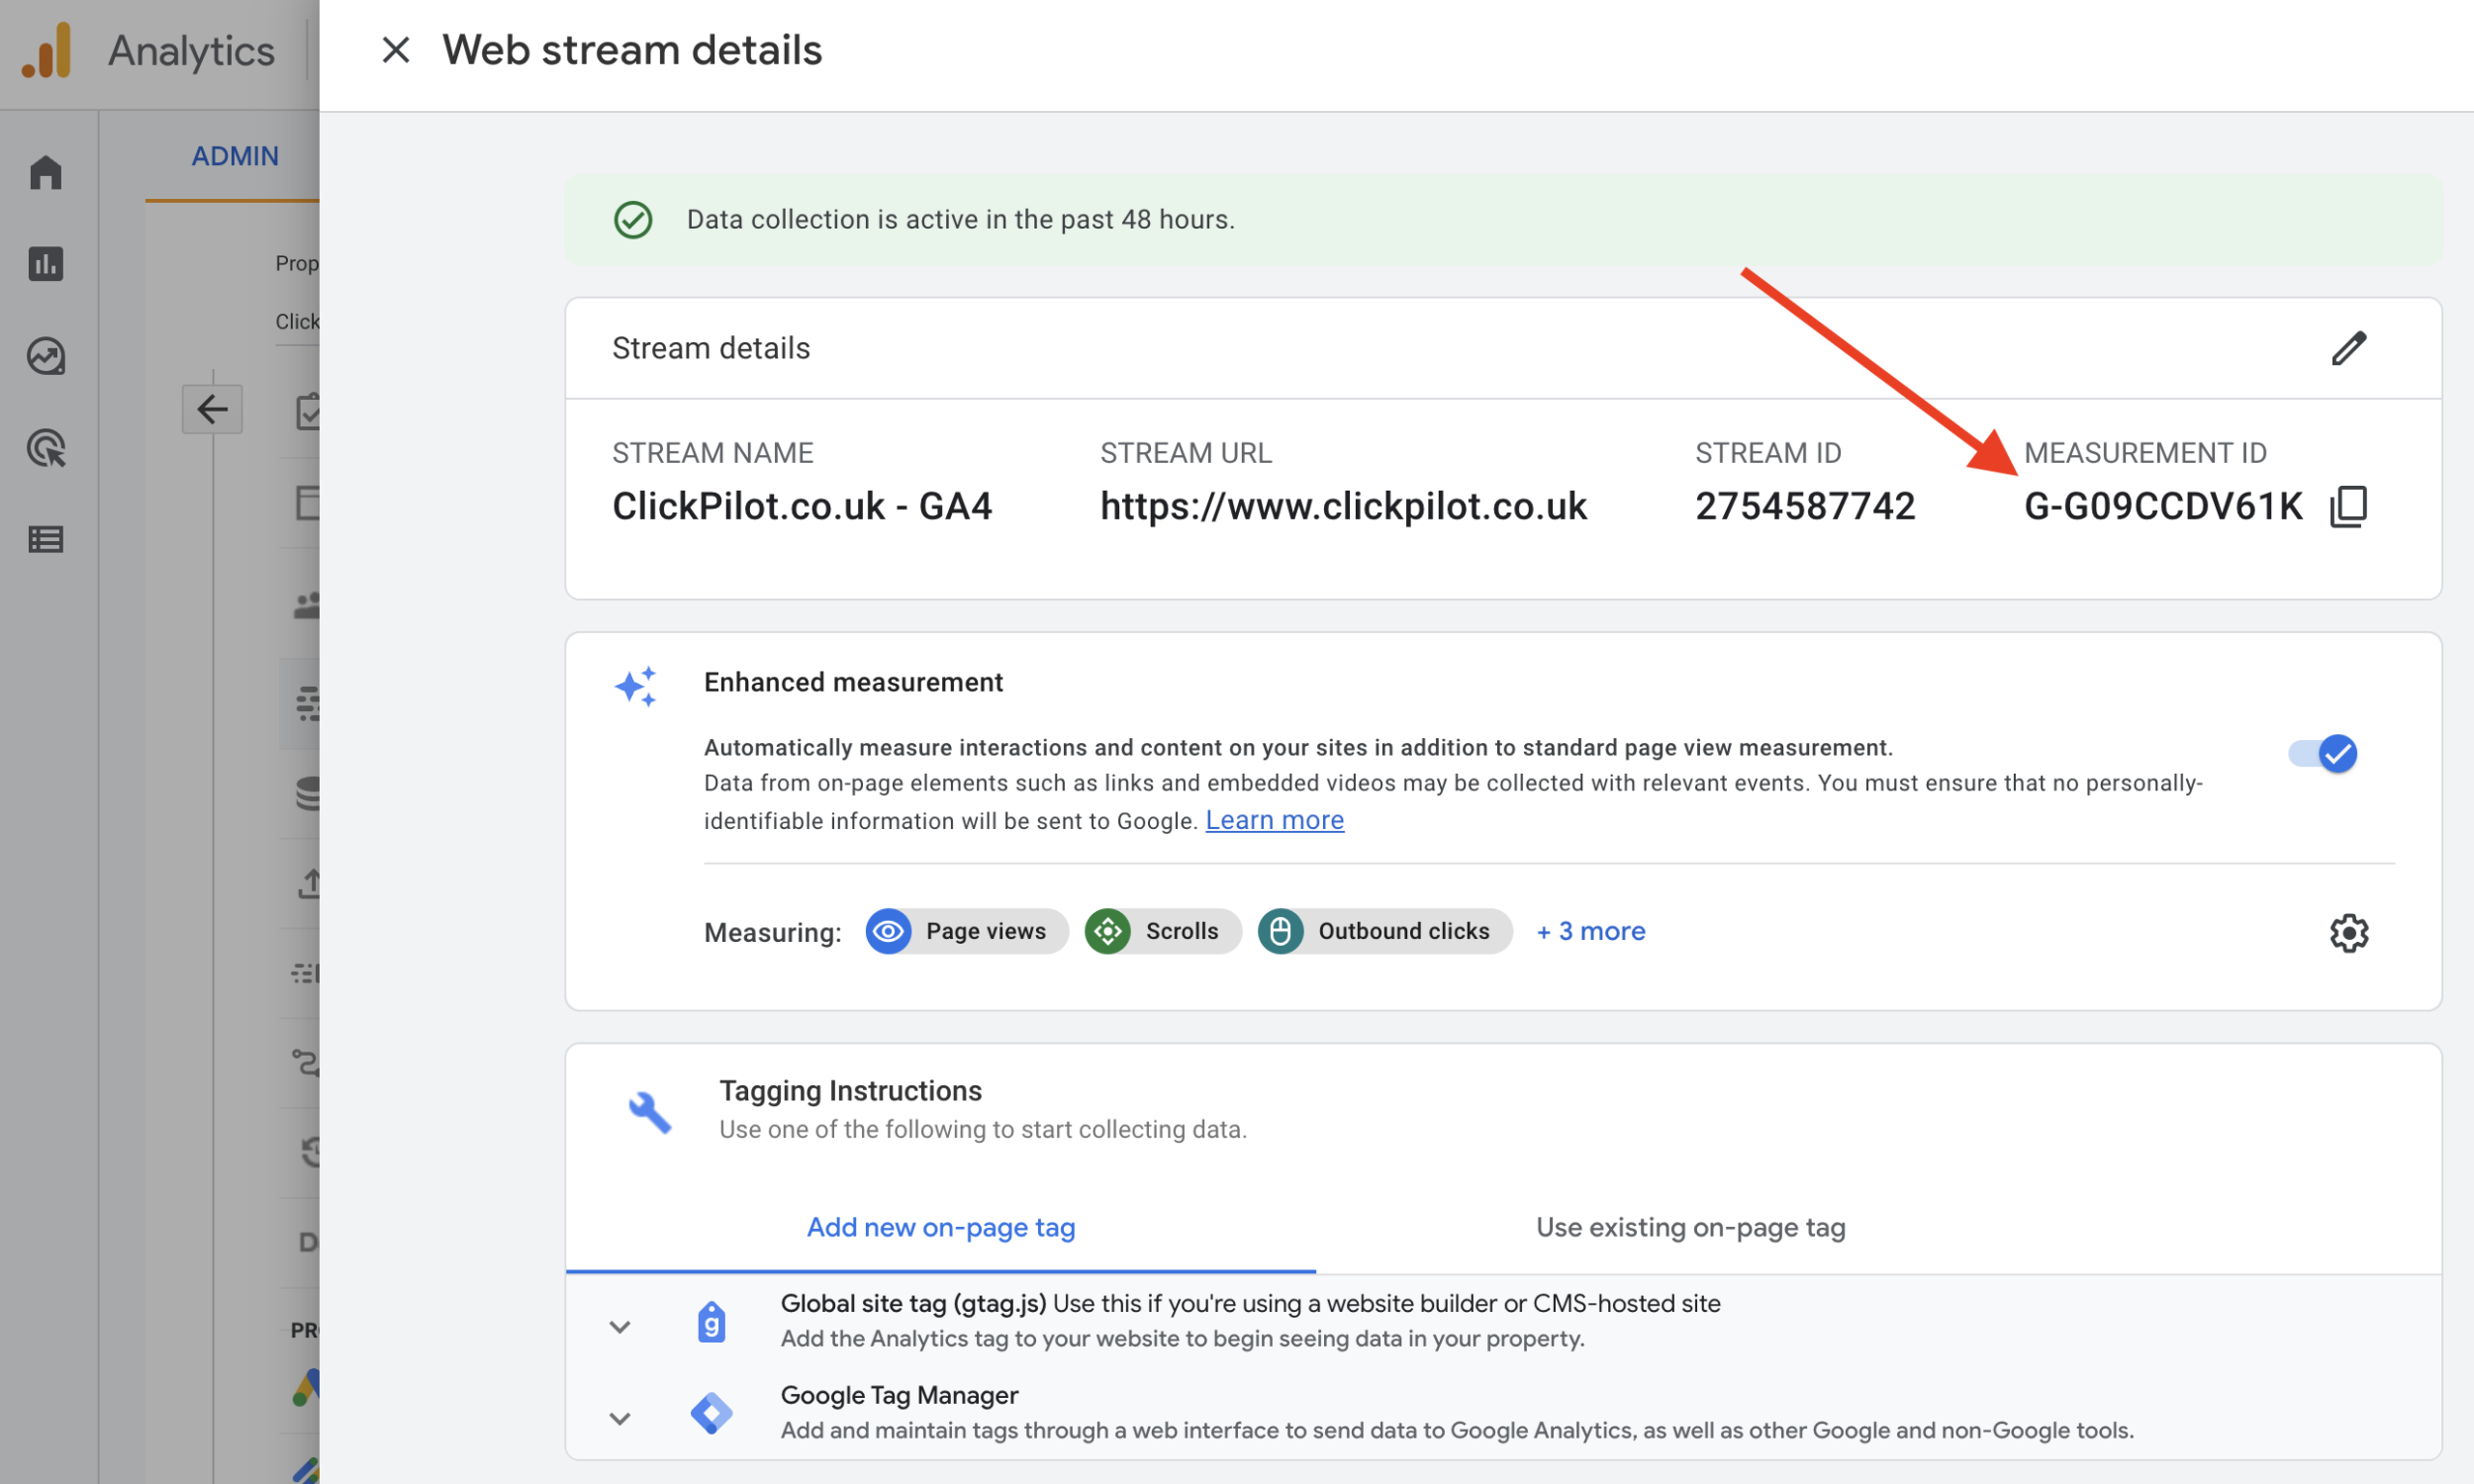
Before heading over to GTM, you'll need to grab a few bits of information from your Google Analytics 4 property (set up in the steps above). So, ensure you are in your Google Analytics 4 property, and go to the admin section. The gear icon in the bottom left corner accesses this.
Your new GA4 on-page tag is located on the details page for the web data stream for your GA4 property. Locate the Property column, check your new GA4 property is selected (there will be a drop-down if you have more than one property), and then select 'data streams'.
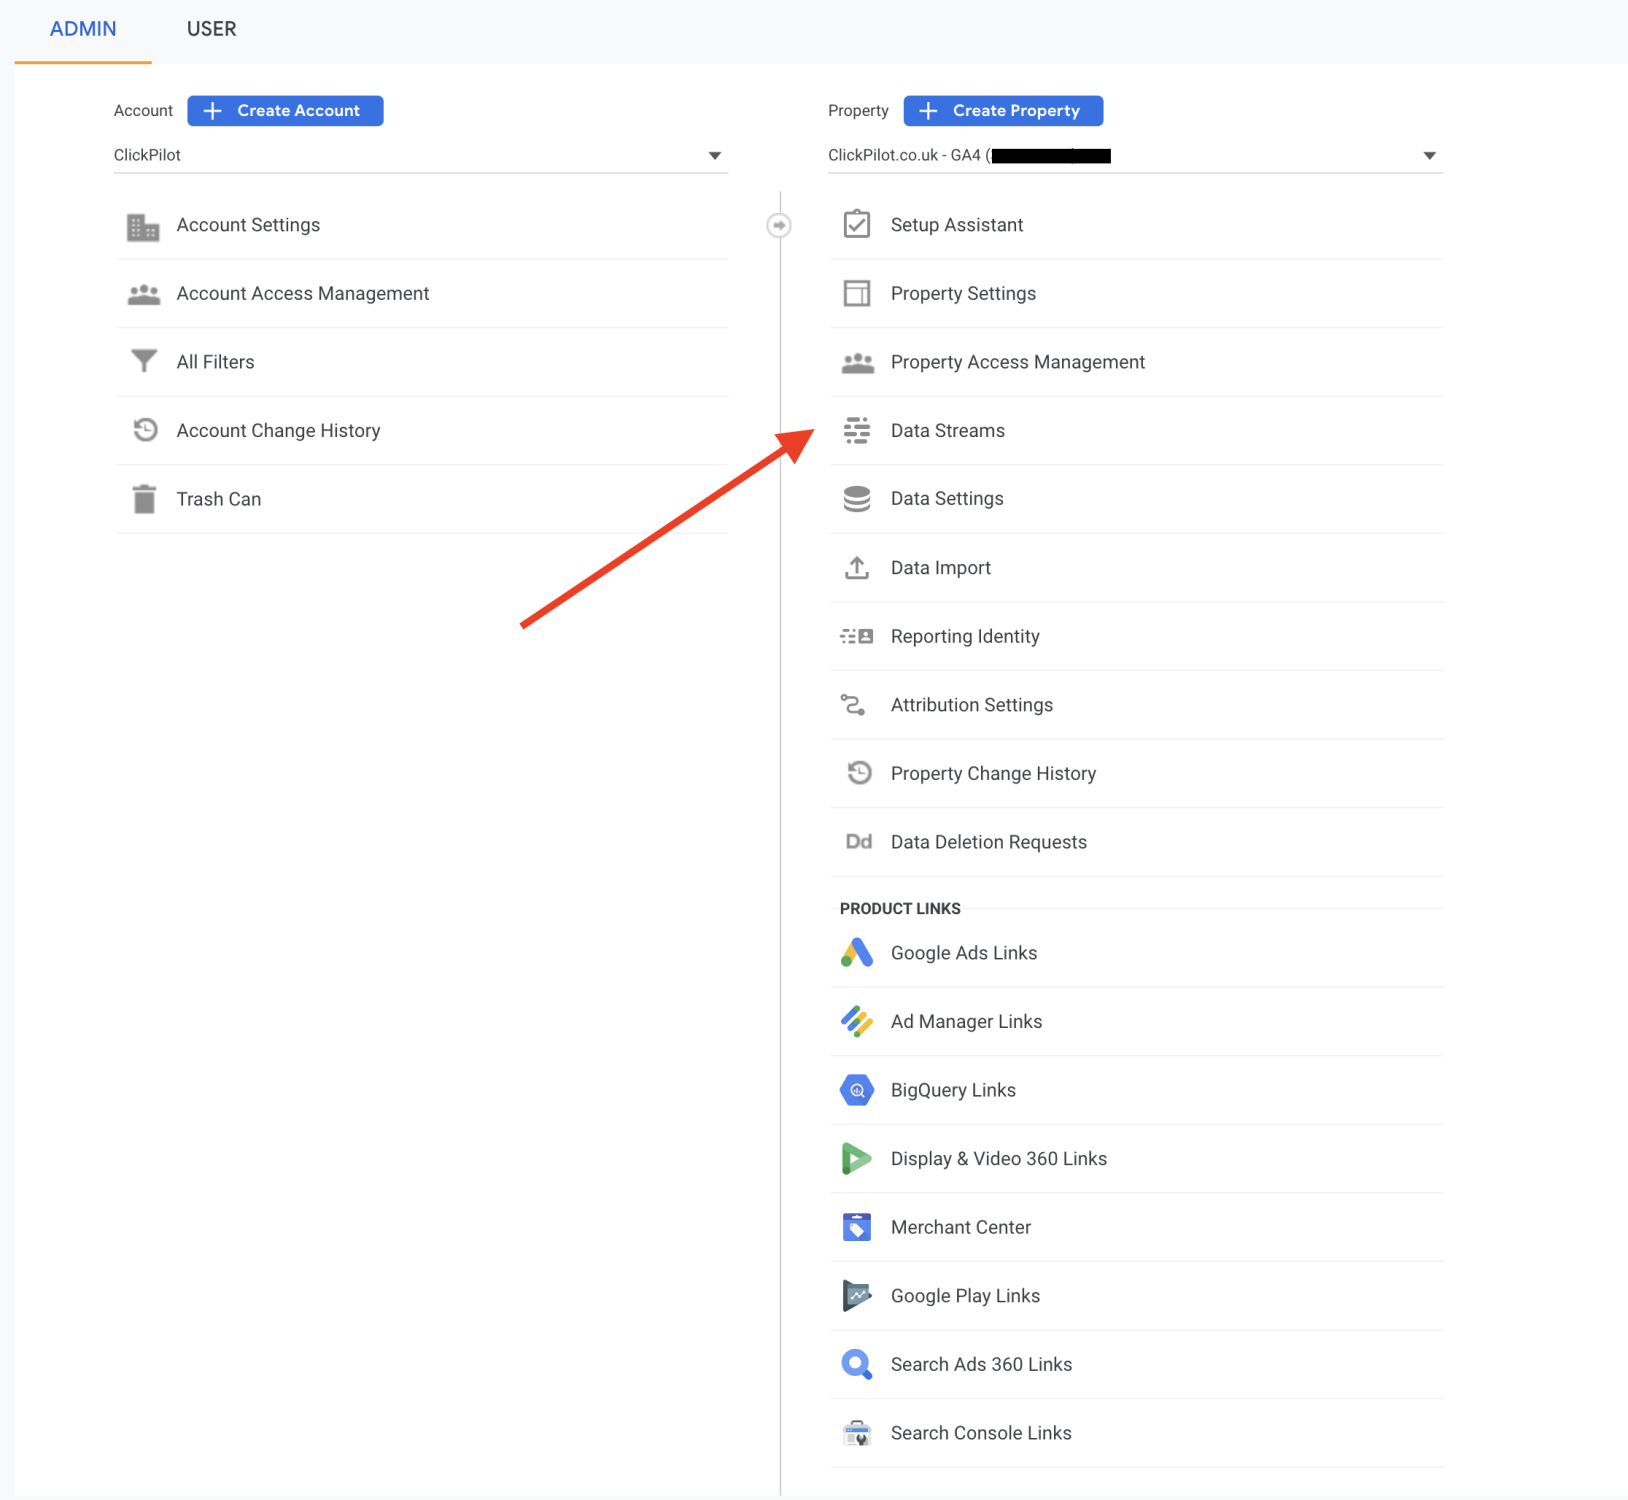
If you don't see a Data Streams link in the Property column, you might be looking at the Admin page for a Universal Analytics property instead of your new GA4 property. So make sure you have the right one selected in the steps above.
Once you have accessed the data streams detail page, you should be able to access the info you need to grab for use in Google Tag Manager. At the top of the page, you should see a number labelled 'Measurement ID'. This is what you need, so copy this.
Step 5
Installing the GA4 Tag in Google Tag Manager
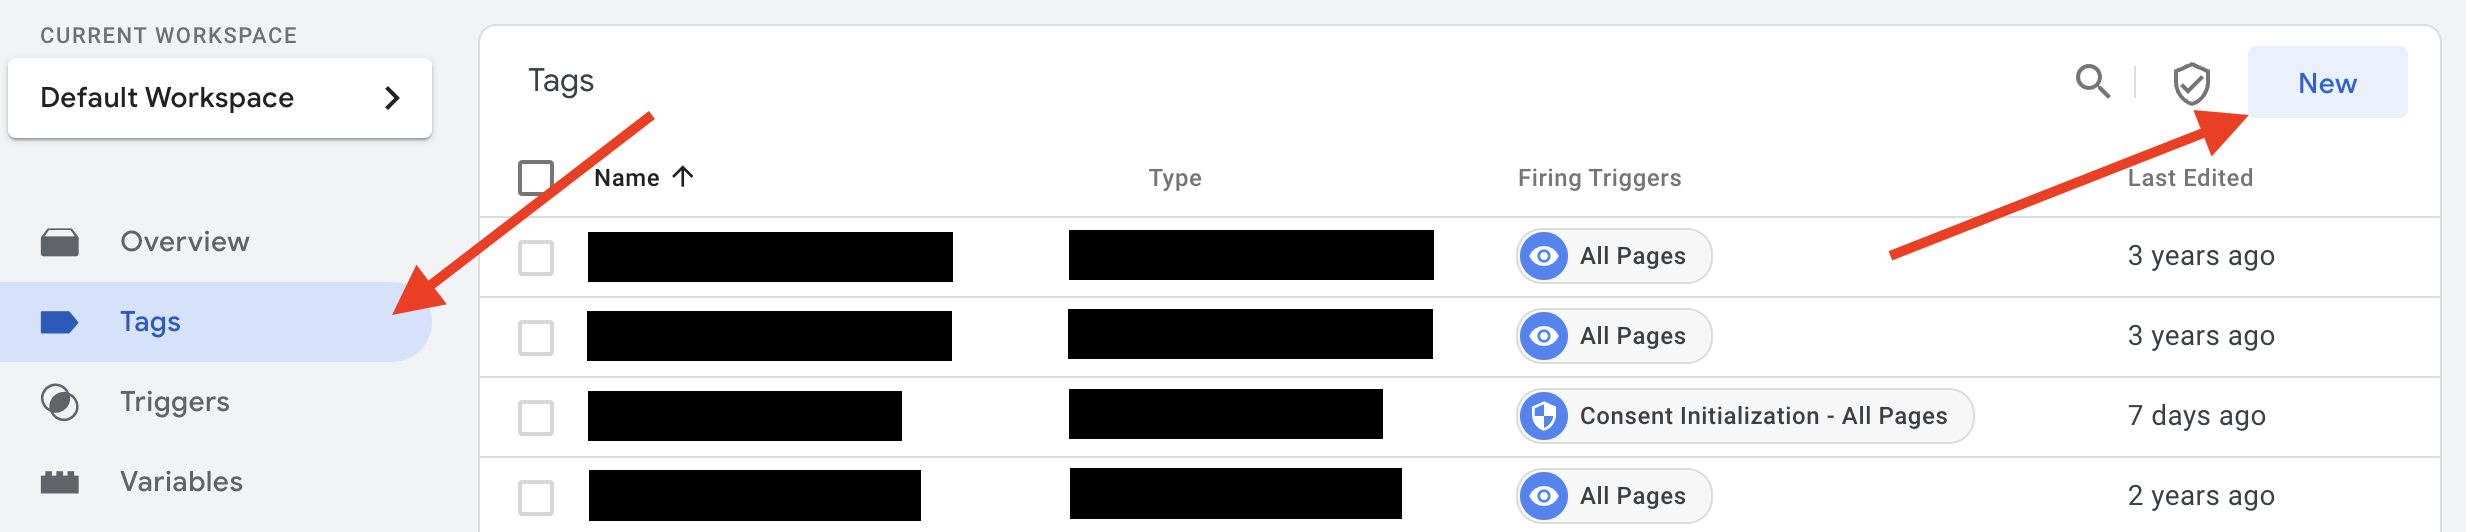
Now it is time to add the tag to Google Tag Manager. Log in to your Tag Manager account and find the container for the website on which you set up GA4.
Click Tags > then New.
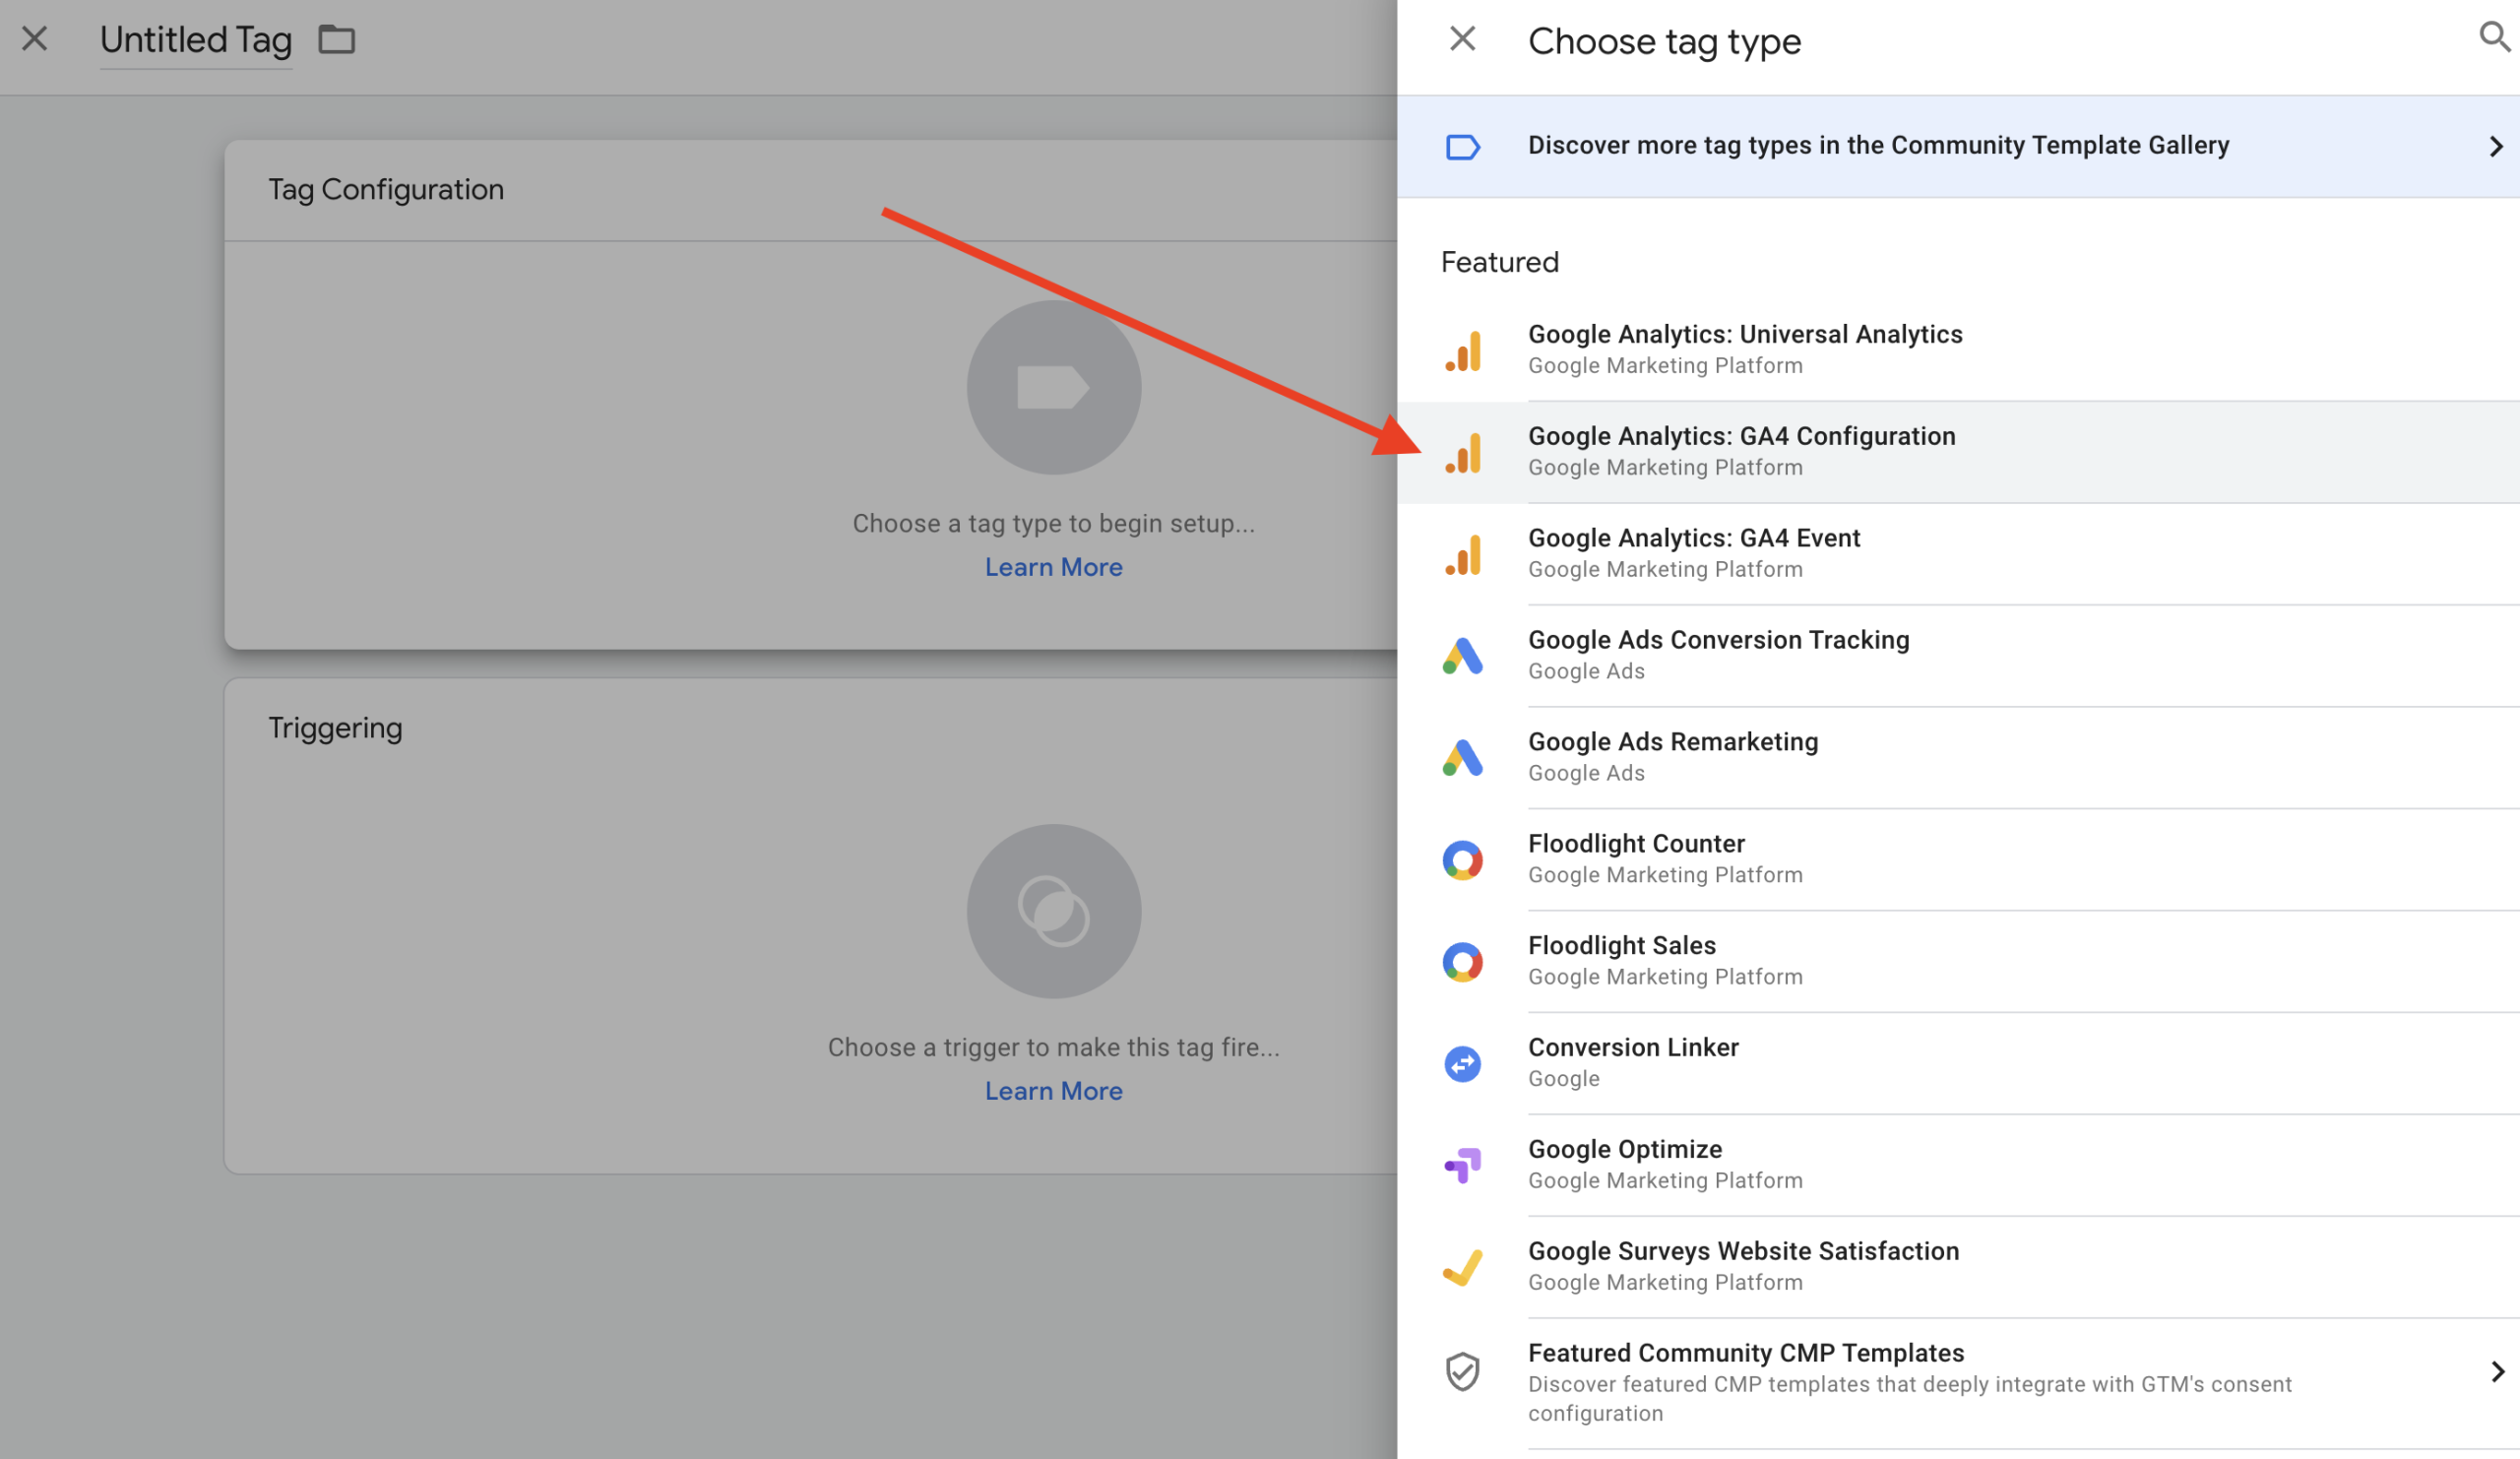
This opens the Tag config, select the tag you need from the list, in this case, it's 'Google Analytics: GA4 Configuration'.
Then you must add the measurement ID taken from your GA4 Property in the box labelled 'measurement ID'.
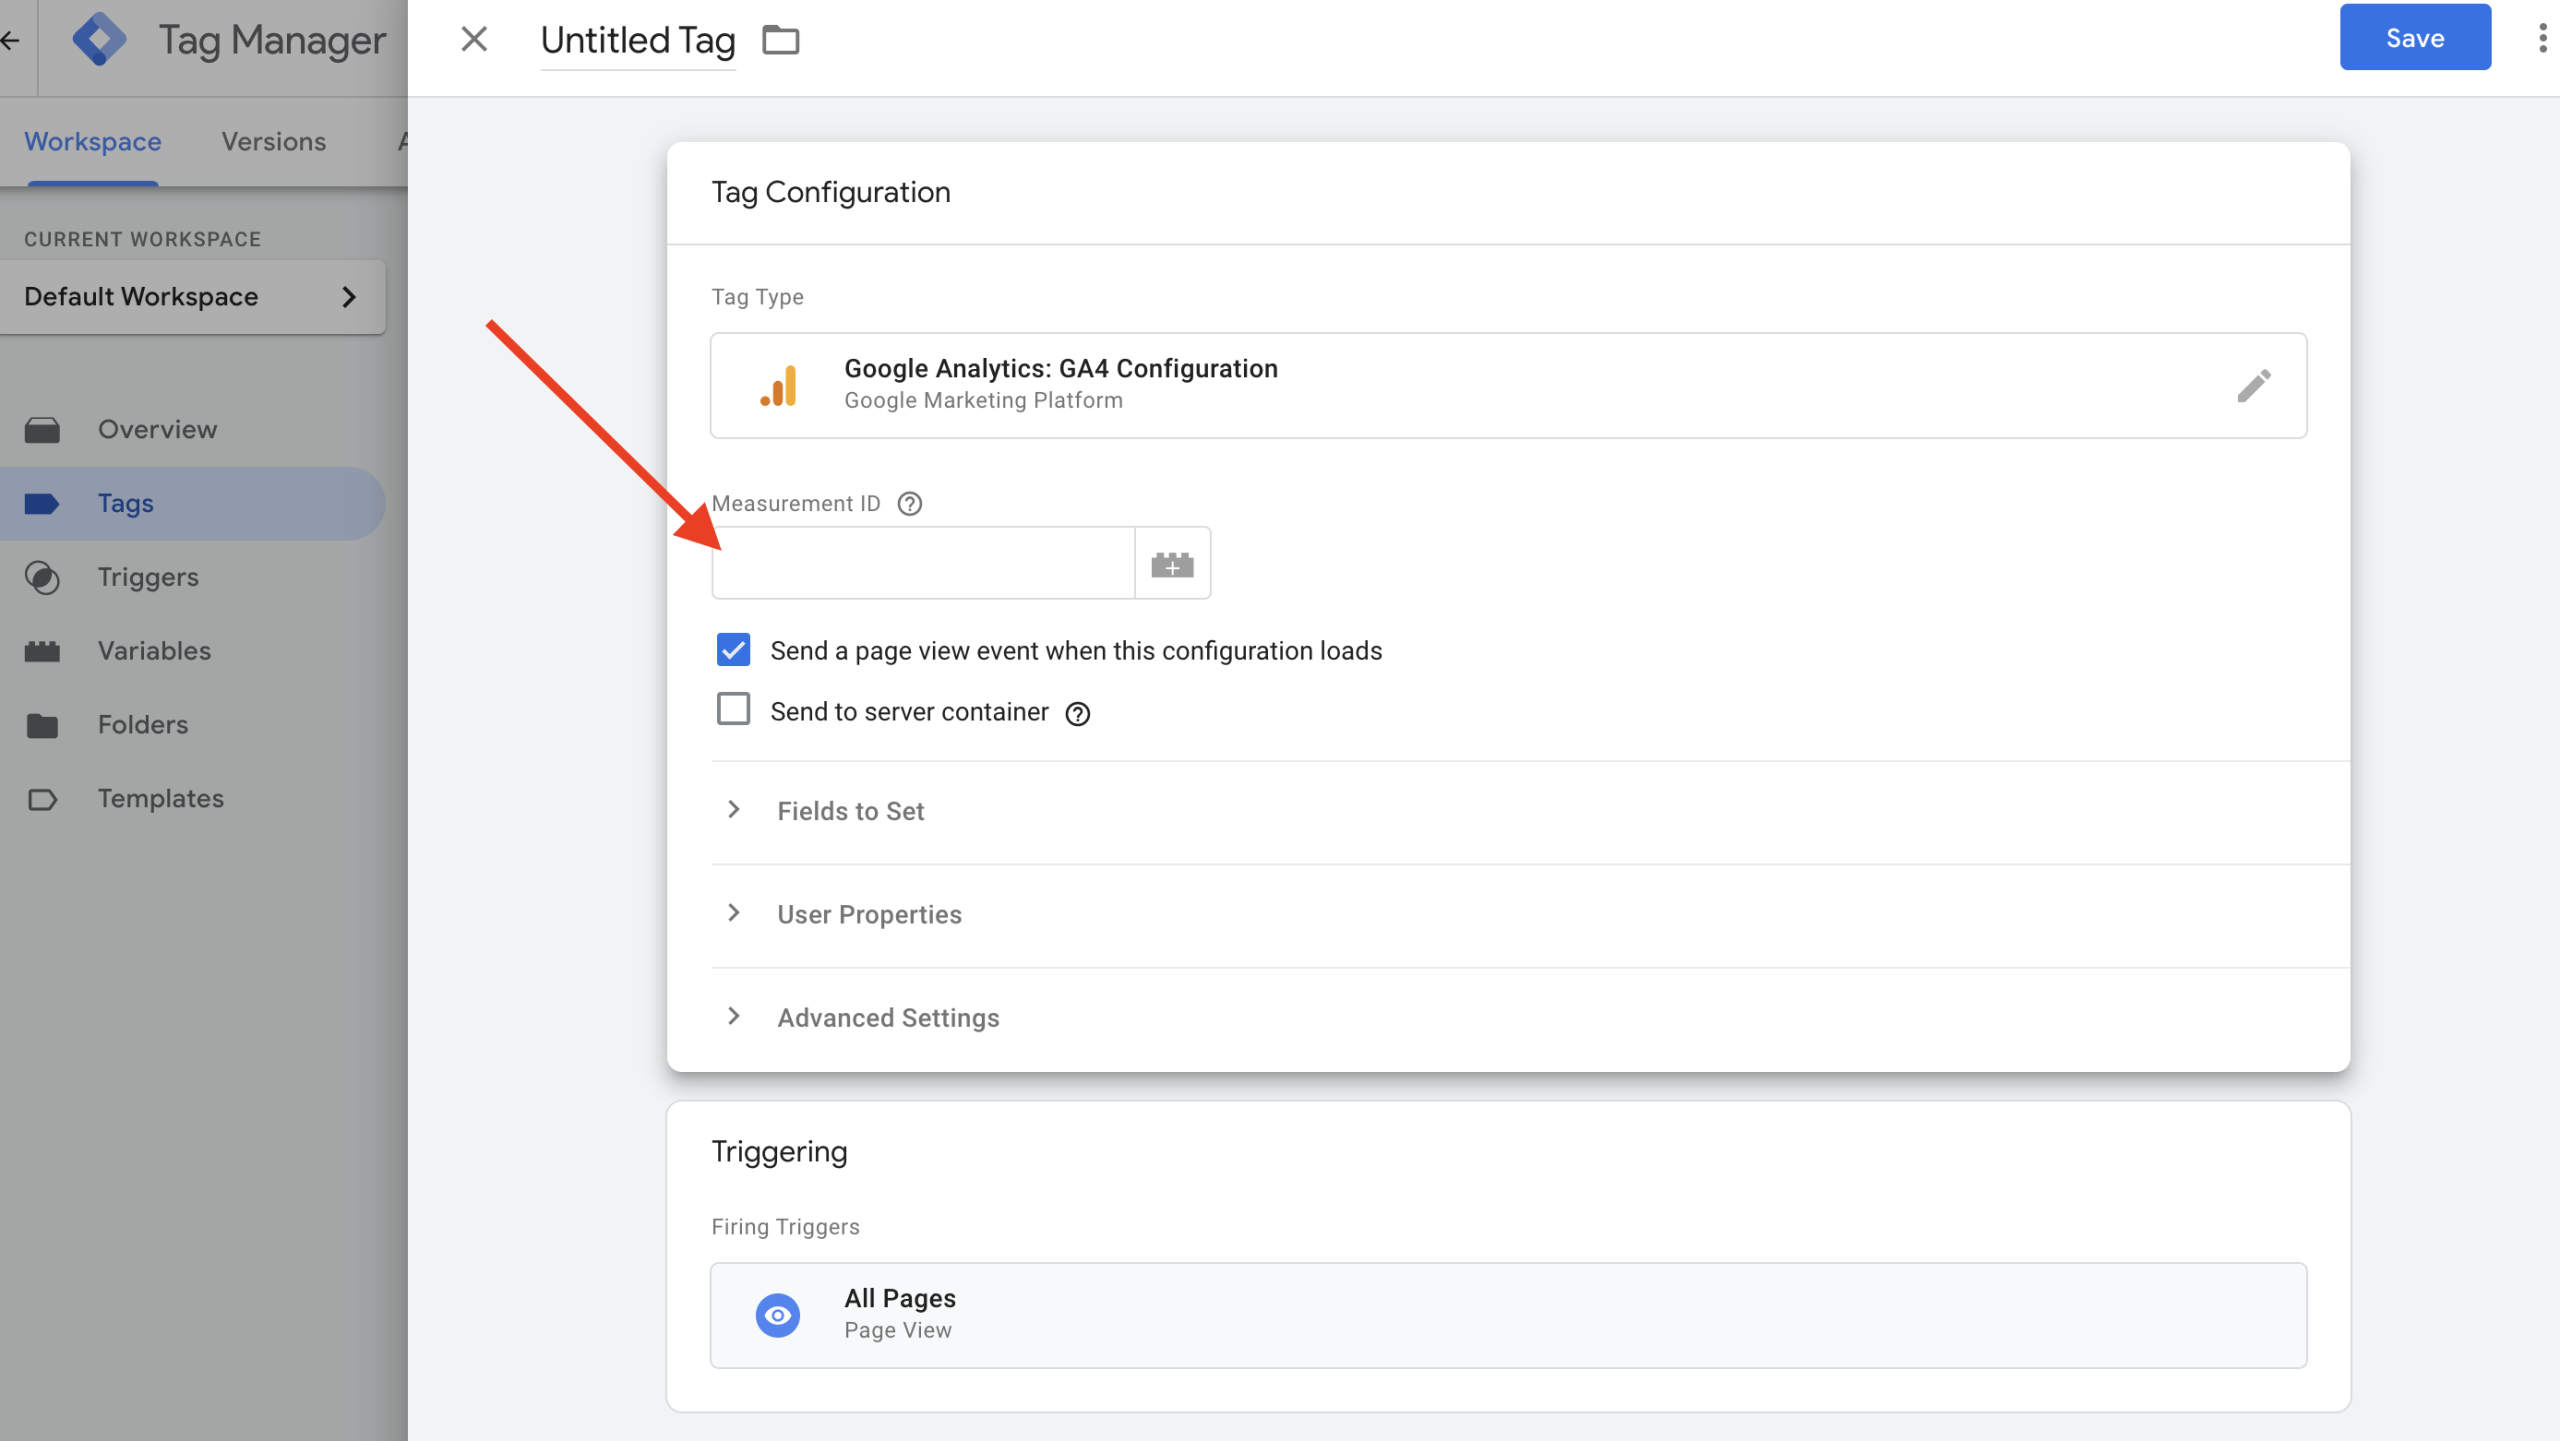
Finally, select the trigger, which in this case we've gone for all pages, as we want to measure data across the whole website, Name your tag and close.
Click submit at the top right to save changes and publish the latest version of your configuration, and you are good to go.
It will take around 48 hours for GA4 to process data once the tag is installed. You can, however, check to see if you are receiving data in GA4. Open a new tab in your browser, go to your website, then return to the GA4 property you have opened in the other browser tab, and choose 'Realtime' from the report menu. This view reports the number of users on your website in real time. So you should see at least one user is active on your website. You are now up and running with Google Analytics 4.
Using Google Analytics will assist you with the consumer journey analysis, allowing you to put a higher value on the entire customer journey rather than just the final touchpoint before purchase. It's only a matter of time until we all convert to Google Analytics 4. With GA4 destined to impact how we measure online activity in the future, gaining a head start on planning, strategy, implementation, and training will be critical.
Book A Discovery Call
Looking for tailor-made PPC strategies? Our team is here to help you maximize your online store's potential. Book a discovery call with us for personalised insights and solutions.
Book Your Free ConsultationBook Your Call